How to Clean, Protect, and Keep Cedar Looking Its Best
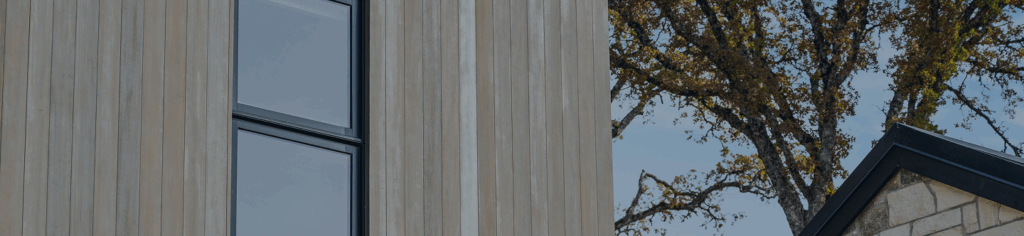
Western Red Cedar (WRC) is one of the most trusted woods in exterior architecture for a reason: it lasts, it stays stable, and it looks good doing it. You’ll see cedar used for siding, trim, and even interior paneling. When it’s installed correctly, it can perform for decades.
With the right finishing and maintenance plan, it can keep its looks too.
This guide covers the real choices people make with cedar: letting it weather naturally, or applying a finish to preserve (or change) the color.
It also breaks down what affects coating life, what finishes work best, and what cedar maintenance actually looks like over time.
Do You Have to Finish Western Red Cedar?
No; and that’s one of cedar’s biggest advantages.
Cedar can be left unfinished and still last a long time, especially when the project is designed and installed to manage moisture.
The tradeoff is appearance. Outdoors, cedar will change color, and in most climates it won’t change evenly.
Option A: Let Cedar Weather Naturally
Unfinished cedar will gradually fade from warm, fresh tones to grey.
In very dry climates it may land in a more uniform, silvery look.
In most real-world conditions, though, sun and moisture hit different areas differently.
That often leads to uneven weathering; darker areas, blotchy grey, and more variation.
If you choose natural weathering, the install matters even more.
Without a coating helping repel moisture, the wood needs to dry quickly after it gets wet.
That means smart details and good airflow.

Option B: Apply a Protective Finish
Finishing cedar can help you:
- keep the natural cedar look longer
- slow down UV greying
- reduce moisture-related wear
- shift the color with stains or paints
Finishes range from fully opaque paints to natural-looking penetrating stains and oils.
The “best” choice depends on your look, your exposure, and how much upkeep you’re willing to do later.
What Affects Cedar Finish Longevity?
When a finish fails early, it’s usually not because cedar is hard to coat.
It’s almost always because the wood, the surface, or the install conditions weren’t right.
Cedar’s Natural Advantages
Western Red Cedar is known for:
- strong dimensional stability (less swelling and shrinking)
- a fine texture that bonds well with coatings
- low pitch/resin compared to many softwoods
Those traits help cedar accept and hold finishes better than many other species.
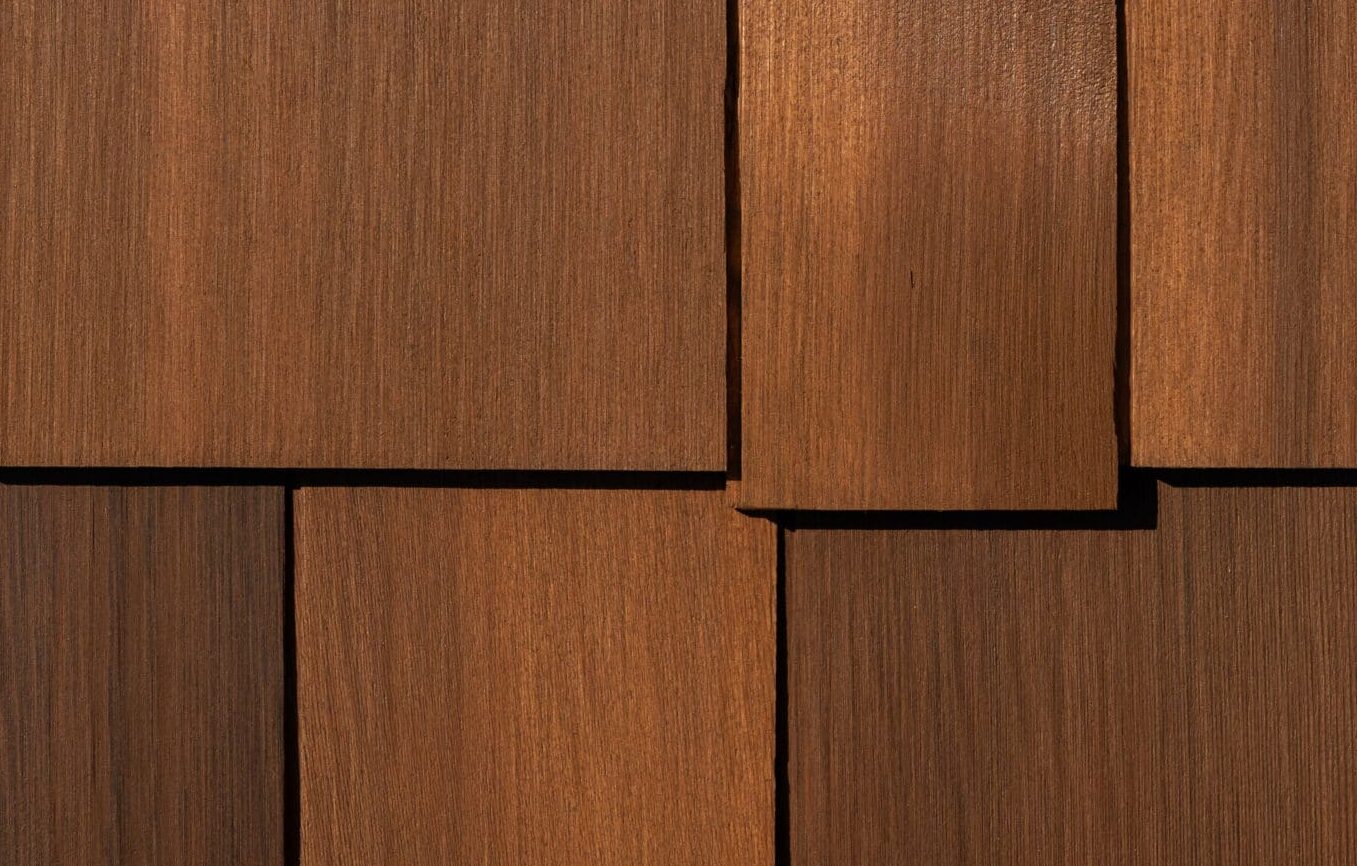
Manufacturing & Surface Texture
Cedar comes in smooth (planed) and textured (sawn) faces. In general:
- textured cedar holds stains better because it gives the finish more to adhere to
- smooth cedar often performs best with a proper paint system (usually multiple coats)
Moisture Content
Finishing cedar while it’s too wet raises the risk of failure. A simple rule:
- cedar should be below 20% moisture content before finishing
- kiln-dried material is often a better starting point because it’s more stable
Installation Details That Improve Performance
Cedar lasts longer and finishes last longer when moisture is controlled from day one.
Best practices include:
- use stainless steel, hot-dipped galvanized, or aluminum fasteners
- install flashing over openings and above band/skirt boards
- provide adequate overhangs at eaves and gables
- use drip caps over windows and doors
- maintain clearance above soil/grade and avoid direct contact with roofing materials
- protect cedar on site (keep it clean, dry, and covered)
- seal cut ends and field cuts (end grain matters)
- consider a rainscreen system to help siding dry and reduce moisture imbalances
Rainscreens are a big deal.
They help the back side of siding dry out faster, which reduces cupping, staining, and coating stress over time.
Choosing a Finish for Cedar Siding and Trim
Most exterior finishes fall into four categories:
1) Opaque Coatings (Paint + Solid-Color Stains)
These provide the strongest UV shielding and surface protection. They’re often the right choice when you want:

- a uniform, consistent color
- maximum UV protection
- a more “set it and maintain it” repaint cycle
Important: cedar contains water-soluble extractives that can bleed into some coatings.
For many paint and solid-stain systems, a stain-blocking primer made for cedar is critical.
2) Semi-Transparent Stains
If you want a cedar look with better UV protection, semi-transparent penetrating stains are usually the best balance.
They tend to:

- soak in rather than form a thick film
- wear gradually instead of peeling (when truly penetrating)
- perform best on textured cedar
- Recoat is easier than paint systems
3) Transparent / Natural-Look Stains
These preserve the most natural look, but they usually offer less UV protection. That means:

- faster color change
- more frequent maintenance
- easier recoating with lighter prep (in many cases)
Factory Finishing vs Field Finishing
Factory Finishing (Often Best When Available)
Factory finishing happens in controlled conditions and can deliver:
- more uniform coverage
- better curing
- fewer lap marks and streaks
- cleaner application (less jobsite contamination)
Field cuts still need resealing, especially end grain.
Field Finishing (Totally Valid When Done Right)
If you finish onsite:
- don’t let cedar sit exposed for long before coating
- even a few weeks of weathering can reduce coating performance
- follow spread rates and dry-time windows
- brushing is often the best method for penetration and adhesion
Cleaning Cedar Siding and Trim
Even unfinished cedar needs occasional cleaning to look its best.
Dirt and organic growth can dull the surface and shorten the life of a finish.
Common issues:
- Dirt: mild detergent and water usually works
- Mildew: must be removed (recoating won’t fix it)
- Iron staining: often from improper fasteners reacting with cedar
- Extractive bleeding: usually moisture-driven — fix the moisture source first
General guidance:
- use gentle cleaning methods and appropriate products
- avoid aggressive cleaning that damages wood fibers
- let surfaces dry fully before refinishing
Refinishing Cedar: What to Expect
Refinishing depends on what was used before.
If it was painted or solid stained
Scraping and sanding may be needed where coating failure exists.
Prep is everything. Most early failures come from poor surface preparation.
If it was a penetrating stain or oil
Often, cleaning and a fresh coat is enough;
especially when the coating has worn thin instead of peeling.
Interior Cedar Maintenance
Interior cedar usually needs less protection. Most interior finishing is about appearance:
- clear finishes can deepen tone and make cleaning easier
- high-moisture areas (like bathrooms) should use coatings rated for that environment
- always test on a sample board first
Practical Cedar Maintenance Schedule
A simple plan that works for many projects:
- Annually (spring is ideal): clean surfaces, remove mildew, inspect joints and end grain areas
- As needed: touch up high-exposure zones (sunny walls, splash zones, horizontal surfaces)
- Refinish timing: depends on exposure, product type, and whether the finish penetrates or forms a film
The Bottom Line
Western Red Cedar performs well with or without a finish.
The right choice comes down to the look you want and how much upkeep you’re willing to do.
If you love the grey look and want minimal coating maintenance, natural weathering can be a solid option, as long as the project is designed to dry well.
If you want more consistent color and added protection, choose a finish system that matches your surface texture and exposure conditions, and prioritize moisture control and proper prep.
Sources
This article is a plain-language rewrite and summary based on guidance from the Western Red Cedar Lumber Association (WRCLA) and Real Cedar (industry education resources). Primary source used:
- Western Red Cedar Lumber Association (WRCLA) / Real Cedar — How to Finish Western Red Cedar (PDF).
https://www.realcedar.com/static/2d35a974acbf517df55a40d13ed6d7a4/How-to-Finish.pdf
Additional references cited within that PDF include (listed here to preserve attribution credit):
Forest Products Society and other wood finishing references (as compiled in the WRCLA document)
USDA Forest Service, Forest Products Laboratory — publications on water repellents and wood protection
Joint Coatings & Forest Products Committee — guidance on rainscreens, end-grain sealing, and back-priming